Making Summary Timesheet Entries
The columns in the Summary Time Sheet Entry form display the employees and pay codes for the payroll. For example:
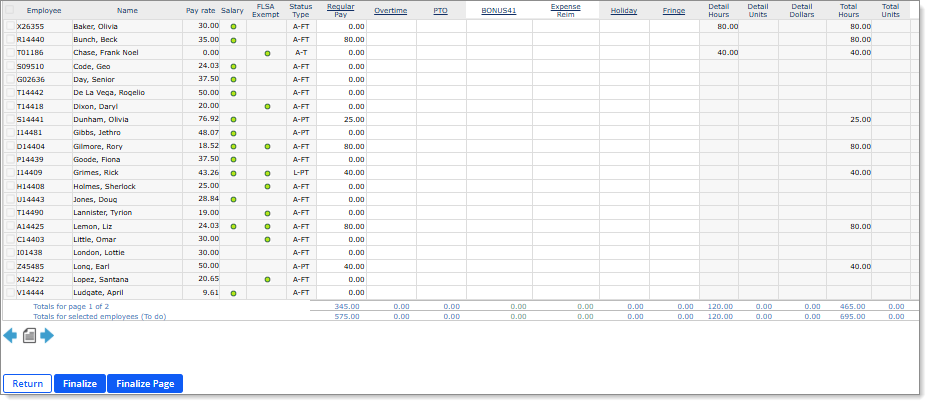
Note the following:
| • | The gray columns are standard. |
| • | The white pay and deduction columns that display are set in the Client Details Time Sheet tab. |
| • | If you import the client’s payroll information, see Importing the Data File. |
| • | You can use the Tab and arrow keys or the mouse to navigate the Summary Time Sheet Entry form. See Making Detail Time Sheet Entries if you need to make detailed entries. |
Follow these instructions when working in summary timesheets:
| 1. | In the appropriate pay code columns, enter timesheet information for each employee. |
If you enter paid time off hours for an employee with default timesheet hours whose position is FLSA exempt, the system warns you and prompts you to determine how to proceed. Click Yes to subtract the PTO hours from the regular pay hours. Click No to add the PTO hours to the employee. (This does not apply to FLSA exempt employees without any default timesheet hours.)
Note: Employees assigned the Variable Salary option as their Pay Method in the Employee Details form display as "salaried" employees in timesheets. This assignment is indicated by displaying a green dot in the Salary column in timesheets. However, the Variable Salary option only displays if the VARSALMETHOD custom feature code is enabled on the System Parameters form.
| 2. | In any deduction code columns, you can enter deduction data for each employee. |
| 3. | Use the scroll bar at the bottom of the page to scroll over to display the rest of the columns in this form. |
| 4. | If there is more than one page of employees, press Page Up and Page Down, or click the |
| 5. | At any point, you can save your work by clicking Return. The Summary Time Sheet Entry form saves and closes, and you return to the previous form. |
| 6. | Finalize the entry using one of these methods: |
| Method | Description | ||||||
|---|---|---|---|---|---|---|---|
| Checkbox next to employee |
Select the checkbox for each employee whose information is complete, and click Return when you are finished. The next time you open Summary Time Sheet Entry, those employees do not display until the entire payroll is finalized. Note the following for worksite managers and worksite trusted advisors:
|
||||||
| Finalize button |
Click Finalize to finalize all employees in the payroll. A confirmation message displays for worksite managers and worksite trusted advisors, "Are you sure you want to finalize and submit this payroll for processing?" If you select Yes, all timesheets finalize. (Selecting No ensures that the system will not finalize the timesheet.) The Summary Time Sheet Entry form saves and closes, and you return to the previous form. Note: A worksite manager or worksite trusted advisor that is set up for self-service payroll processing will not see the message when they click the Finalize button. |
||||||
| Finalize Page |
Click Finalize Page to mark all employees on the page as complete. Clicking this button on the last page of a timesheet that has not been finalized displays a message for worksite managers and worksite trusted advisors, "All employees for this payroll have been finalized. Do you want to finalize and submit this payroll for processing?" If you select Yes, the system finalizes the timesheet and all employees and the payroll moves into TSOKCOMP status. (Selecting No does not finalize the timesheet and employees, and you return to the Summary Time Sheet Entry form.) Note: If you click the Finalize Page button and there is still another page that needs to be finalized, no message displays. |
Note: Not all users have access to the Finalize or Finalize Page buttons.
| 7. | Once the batch is finalized, you can proceed to the next step in the payroll process. |
Receiving Email Notifications After Finalizing Payrolls
After a worksite manager or worksite trusted advisor in a client that is not set up as self-service payroll finalizes a payroll, the system sends an email notification to the payroll processor for that payroll who is listed on the Payroll Control form, even if the user ID is different from the user ID listed on the Account tab in the Client Details form.
Note the following conditions that must exist for the system to create the message for payroll submission notifications:
| • | If the system-level setting to enable payroll submission notifications is checked and the client-level setting is set to Select or Enable |
| • | If the client-level setting for payroll submission notifications is set to Enable when the system-level setting is not checked |
The email message displays as follows:
| • | Subject line: "Payroll <number> submitted for client <Client's DBA name> (<Client ID>)." For example, "Payroll 202206 submitted for Client JMF Photography (1211)." |
| • | Email body: "Payroll <number> has been submitted for processing." For example, "Payroll 202206 has been submitted for processing." |
Unfinalizing Entries
If you need to unfinalize entries:
| 1. | Deselect the checkbox for each employee whose information you need to change. |
| 2. | Select the checkbox at the top of the Employee column to deselect all employees on the page. |
| 3. | Click Unfinalize All to deselect all finalized employees in the payroll. |
Making Detail Time Sheet Entries
Using Time Sheet Entry Keyboard Shortcuts
Using Standard Time Sheet Column Definitions
